Showing posts with label Birthday. Show all posts

Wednesday, April 19, 2017

Cedric is 5! {and 4 too}

I just spent a few hours looking through old posts of my kids growing up.
Doing so gave me a renewed sense of just how important documenting a few of our moments is.
I do love sharing but love reflecting even more.
So here we go, I'm documenting Cedric's 5th birthday.
Which was at the beginning of March. 
Not too bad, only 1.5 months late.
{But wait for it.}
 I was determined to dial back with the themed parties.
Then Cedric asked for a lego birthday and I just couldn't stop.
The cake was fun to make but the candle holders put it over the top if you ask me.
 Dollar store plates made for good lego blocks and dollar store cups were easily made into lego heads.
The kids got those lego storage heads for Christmas and they became the perfect snack bowls.
 Ced has long dreamed of an outdoor party which proves challenging with a March birthday in Edmonton.
We decided, however, to commit to the idea and ended up with a beautiful balmy winter day.
We loaded up the wheelbarrow and headed down to the creek to roast hotdogs.
We also took our piñata down.
We usually buy one at bulk barn but this year had a homemade lego block.
 I made it by gift wrapping a box that I had weakened a little and putting card stock circles on it.
I was a little worried that we'd end up having to rip it open but on the second round it literally exploded and sent the kids running and screaming to the candy, perfect.
 After lunch, the party was moved to our house for cake and more birthday fun.
 Cedric stated after that it was the best birthday ever.
But he said that last year too of course.
So here's what you've been waiting for, Cedric is 4!
{And was for a whole year, in which I neglected to share.}
Last year was hands down a Paw Patrol theme.
This one I did keep pretty simple with minimal decor {streamers and balloons not pictured}.
Dog bowls filled with puppy chow naturally.

And my kids have somehow decided that it's not a party without a piñata.
They are a nerve wracking part of each of our parties but who am I to deny this dangerous fun?
Happy birthday x2 buddy!

Monday, April 17, 2017

Fiona is 7! {Today!}

 {Oh but this post is also about her turning 6.}
I'm feeling super on top of it today.
I am posting about this amazing girl's birthday in a timely fashion.
{There is that little matter of needing to share last year as well though.}
This year there was no doubt that Fiona wanted a fairy birthday.
We've done the fairy theme before but she has a new-found love for fairies.
She recently built a fairy house you see, and has been getting occasional visits from her fairy pal named Fliona who leaves messages and a trail of fairy dust behind.
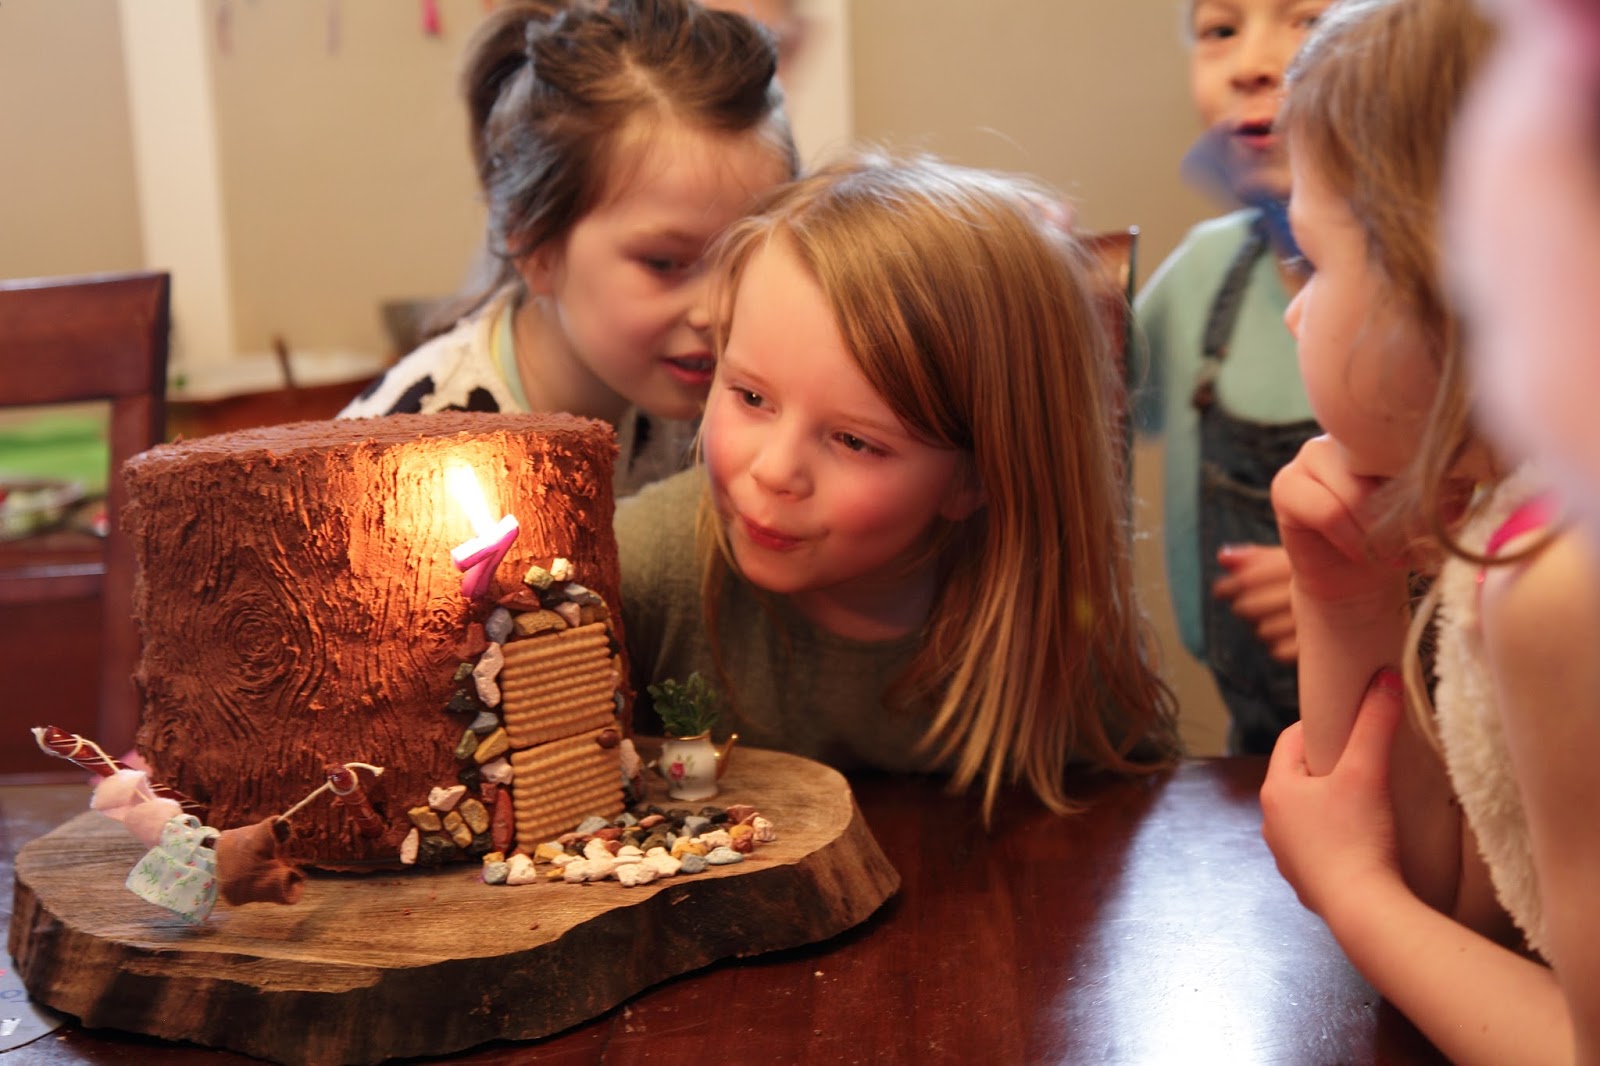
So of course her cake needed to be a fairy house.
This baby needed six layers to get the desired shape.
There was no shortage of cake for this party.

 Last time we did the fairy theme it was all about floral and vines.
We even made floral crowns.
This time we found other ways to make the room whimsical mostly involving twigs, yarn and beads.
Below is actually Fiona's hundred day project for school and served as our inspiration.
This hanging will stick around for a while.
For the "craft" the kids made wands/fairy sticks but many ended up making fishing rods.
I use the word craft loosely since I don't really direct them, just put out supplies and let them at it.
Ok now for catch up time.
Last year Fiona wanted a woodland theme so we dreamed up a sweet little cake.
This was take one.
We ended up cancelling Fiona's party since Daddy was stuck out of town in the hospital.
He ended up coming home 2 weeks later and missing the actual day.
In an attempt to keep it special we still had a celebration with family and close friends, all the while knowing we would reschedule once Jeff made it home.
So here's the real deal.
We turned this into a birthday/thank you to all who helped me stay sane while Jeff was gone.
The weather was fantastic {not like this year's snowstorm} so a BBQ felt just right.
 Happy birthday twice over my sweet babe.

Sunday, April 26, 2015

"Fiona's Five" a Fairy Fête

It's happened.
I have a five year old.
And she's fabulous.
But you already knew that.
Fairy Party
Fiona decided on a fairy theme after a heart to heart discussion about too much of a good thing.
We still love you Frozen but I just can't anymore.

I may have added a little "woodland" to the fairy mostly so I could grab 90% of the decorations on a cabin nature walk.
Some ripped fabric added some whimsy to this branch.
This ended up being one of my favourite decorations and has gained a permanent spot in Fiona's room.
Fairy Party
 These pre-bud willows will also take up permanent residence in our home.
{Sans pink flowers.}
Fairy Party
 Fiona couldn't even handle this cake garland.
As I was making it she showered me with positive reinforcement.
Fairy Party
We did flower crowns and woodland elf hats.
I found this foam covered gardening wire at Dollarama and wrapped it around itself to create places to stick flowers.
The flowers and ribbon were also all Dollarama.
After the girls were done decorating I went over the ends with flower tape to prevent my-flower-crown-is-falling-apart meltdowns and secure the sharp wire bits.
They all looked precious and had fun making them but I may have enjoyed it even more.
This craft will have to make a comeback.
Fairy Party
 Flower garlands...
Fairy Party
 And mossy wood hanging from the light fixture.
Obviously.
Fairy Party
 Our picture frames were filled with pink and purple fairies.
I also changed up the chalkboard but neglected to photograph that with the real camera.
I refer you to Instagram if you just can't handle not seeing it.
Fairy Party
 Make a wish baby.
Fairy Party
 There are the little hats I mentioned before.
They took approximately 1 minute each to sew on the machine with little pre-cut felt pieces.
Fairy Party
 As always we had so much fun decorating and preparing but our fabulous friends make the magic.
Thanks to all who celebrated with us.

Thursday, April 2, 2015

Cedric is 3! {And Has Been for Almost a Month}

When I asked Cedric what type of birthday he would like he gave his answer without a hint of doubt.
"Mota-cyco!"
Motorcyles that is, for those who don't speak Cedric.
After some thought we expanded a little to motorcycle racing.
Mostly so I could fill the house with these sweet banners.
He didn't mind, of course.  As long as something was "vrooming" he would be happy.
Racing Birthday
Our new chalkboard wall got it's first workout.
A calligrapher I am not, but I had some fun with it.
Happy Birthday Cedric chalkboard wall
This balloon and streamer combo is always a hit with the kids.
Racing Birthday
And who needs party games when you have toy cars and tracks.
Racing Birthday

Racing Birthday
I have been rotating the prints in these frames with free online printables to suit the occasion.
Freepik.com had plenty of choices.
Racing Birthday
The cake needed to be motorcycle themed of course and after scrapping many a Pinterest idea I copied this graphic from one of the birthday boy's old onesies.
Racing Birthday
We had a great turnout of family, friends and neighbourhood kids and Ced definitely felt the love.
Thanks to everyone who celebrated {on that day or any other} our boy turning 3!

Friday, October 17, 2014

Green Project: Prince Charming Costume

Still recapping the summer here but this costume post comes just in time for Halloween.
Fiona's BFF turned 5 in June and after his Mama blew my mind with some beautiful handmade doll bedding {I'll have to share that soon} for Feefs' birthday I knew I also wanted to get crafty for his gift.
Dress up is big in our house {and occasionally out of the house, like the grocery store, park, walk, etc.} and though Charlie has been a great sport dressing up in some pretty feminine frocks, I wanted to expand his options.
Presenting: Prince {Charl}ing.
DIY Prince Charming Costume
I had in my mind something similar to Prince William's wedding wear.
I considered starting from scratch but that's not really my style.
I decided instead to source out an outfit I could repurpose.
A trip to Value Village delivered this lovely ensemble for the bargain price of $6.98.
 Another $12 spent on the trimmings at Fabricland and I was all set.
 I started by turning the blazer inside out and ripping the side, shoulder and sleeve seams.
I used a jacket that I knew would fit Charlie and measured the width from collar to shoulder seam then marked that with a pin {remember to add 1.5cm for a seam allowance to each marking} on the blazer.
I then marked the midline and measuring the width of the torso on my model jacket to mark the side seam.
After cutting off all the extra by following the above pins on one side...
...I just folded the jacket in half on the midline that was already marked above and cut the second side to match.
To finish the torso I just sewed the side seams back together.
Now it was time to fit the sleeves.
Again, I grabbed the model jacket and measured the width of the sleeve at the top and bottom and pinned {with seam allowance} as well as the length.
After sewing the length of the sleeve and turning it right side out I fit it into the arm hole {you may have to work on this for a few minutes} and sew this seam.
A simple hem on the ends of the sleeves finishes them off.
I left the length as is since I wanted it a little long for the look but also so it would fit for a while.
I also left some extra length on the sleeves for the same reason.
The collar was an easy fix since lifting it up then folding it in on itself once made it quite princely.
I pinned some gold trim around the neck line before sewing the collar down to finish it off.
I started on the side with the buttons so that I could continue all the way down the front just inside the button holes.
After this I also replaced the buttons with some flashy gold ones.
The last detail on the jacket was to create some epaulettes. 
Some simple fringe folded in half and sewn down the middle did the trick.
Before I fastened one shoulder's epaulette I wanted to attach a sash, this is where the bright red blouse came in.
I was lucky to find one with a little embellishment but one without could also work.
I cut the button down part from top to bottom, sewed the bottoms together then used the top button to secure the bottom of the sash after putting it on.
I slipped the whole thing under one epaulette then sewed it in place since we all know accessories tend to go missing on kid costumes if they're not attached.
 And what kind of prince would he be without a crown right?
I actually don't know if I've ever seen Prince William sporting a crown but it still felt necessary.
I took a piece of gold lamé measured and cut to the diameter of Charlie's head {with an extra 3cm for seam allowance} then folded it in half and pinned it approximately every 3 inches.
 I used the pins to guide the points of my cut but otherwise just winged it.  
The crown could be made any shape or height here but I liked this simple look best.
Cedric was so excited about the crown {depicted below} that I was glad when my first attempt ended up a little small and could be kept for him.
 To give the crown some standing power I cut some fusible batting the same size as my folded lamé then ironed it on.
I stitched along the top {with the batting facing out}, cut the edge a couple mm from the stitch {an important step otherwise you won't get a nice shape at the top} then turned it right side out.
Once you turn it you need to work the points out which I usually do by hooking a straight pin into the fabric and pulling from the outside.
 To finish it off simply fold the ends of one side in, insert the other end into it and stitch on the outside {see below}.
DIY Prince Charming Costume
 I also bought some black pants and used the extra fabric from the blazer to sew a tuxedo stripe down the side but this is purely optional since plain black pants look just great.
 Now we have a legitimate prince costume to match the many princess dresses.
 Not to say this guy doesn't still rock the feminine garbs from time to time.

LinkWithin

Related Posts Plugin for WordPress, Blogger...